



Micro-Vickers-hardheidsmeter: 10 cruciale factoren voor nauwkeurige microhardheidsmetingen


What Is a Micro Vickers Hardness Tester?
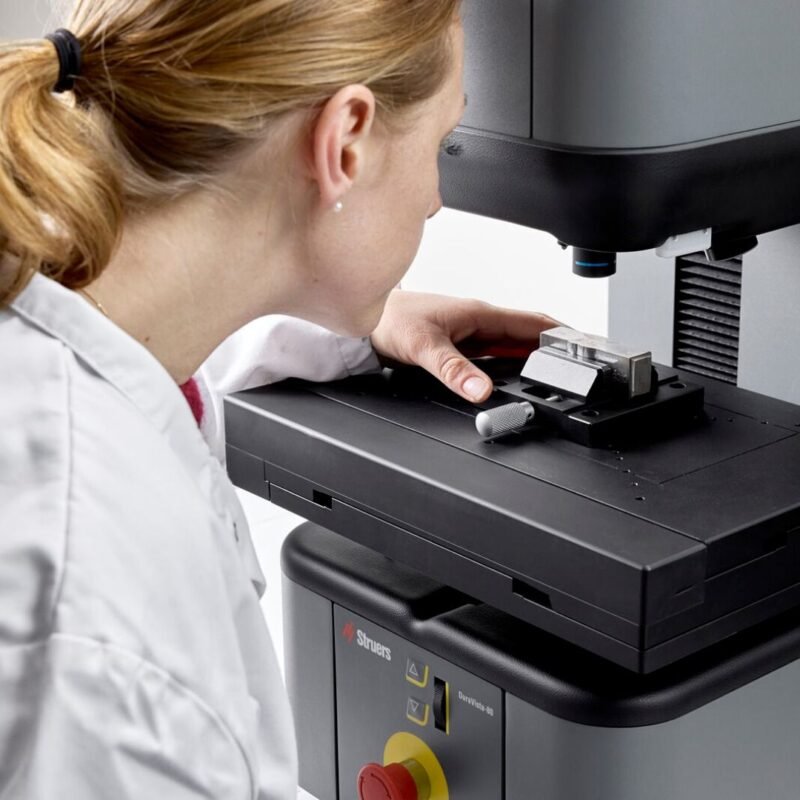
A Micro Vickers hardheidsmeter is a precision hardness testing instrument designed to measure the hardness of very small areas using relatively low test forces and a diamond Vickers indenter.
Unlike conventional hardness testing on large specimens, microhardness testing is designed for applications where the test area is limited. The resulting indentation can be small enough to analyze localized regions of a material without significantly affecting the surrounding area.
This makes micro Vickers testing valuable for thin sections, coatings, surface-hardened layers, small components, individual phases, and research specimens.
The method is based on the Vickers principle: a diamond-shaped indenter creates a square-based indentation, and the diagonal dimensions of that indentation are measured optically.
How micro Vickers testing works
A typical test involves several stages:
- Prepare a suitable test surface.
- Position the specimen securely.
- Select the appropriate test force.
- Bring the diamond indenter into position.
- Apply the specified force for the required dwell time.
- Remove the force.
- Observe the indentation through the optical system.
- Measure the indentation diagonals.
- Calculate or automatically determine the Vickers hardness value.
Because the indentation can be extremely small, each stage needs to be carefully controlled.

Why low test loads matter
The main advantage of micro Vickers testing is the ability to apply relatively low forces.
Lower forces produce smaller indentations, allowing measurements to be made in areas that would be unsuitable for conventional hardness testing.
This can be particularly useful when the material contains different microstructural regions or when the available test area is very limited.
Where Micro Vickers Testing Is Most Useful
Microhardness testing can be valuable when conventional Rockwell or standard Vickers testing would produce an indentation that is too large for the application.
Typical examples include:
- Dunne coatings
- Plated surfaces
- Geharde lagen
- Small electronic components
- Fine wires
- Thin sheets
- Lasdoorsneden
- Heat-affected zones
- Metallografische monsters
- Research samples
- Individual material phases
The method is especially useful when hardness needs to be mapped across a small area rather than represented by one measurement for the entire component.
10 Critical Factors for Reliable Microhardness Measurement
1. Test force selection
Test force is one of the most important variables.
The selected force should create an indentation that is large enough to measure reliably while remaining suitable for the thickness and geometry of the test area.
An excessively high force can produce an indentation that is too large for a thin layer. An excessively low force can make the indentation difficult to measure accurately.
The correct balance depends on the material, specimen geometry, and applicable test requirements.
2. Indenter quality
The Vickers indenter has a precise diamond geometry.
Its condition directly affects indentation shape and therefore hardness calculation.
The indenter should be:
- Correctly installed
- Schoon
- Free from damage
- Properly aligned
- Suitable for the testing system
A damaged or contaminated indenter can produce distorted indentation geometry.
3. Optical measurement
Micro Vickers testing depends heavily on accurate indentation measurement.
A suitable optical system should provide enough magnification and image clarity to identify the indentation corners.
Important characteristics can include:
- Optical resolution
- Illumination quality
- Camera performance
- Measurement software
- Image contrast
- Operator focusing control
For very small indentations, optical performance becomes a major part of the measurement system.
4. Surface preparation
A good indentation is difficult to measure on a poorly prepared surface.
The test surface may need grinding and polishing to remove:
- Rough machining marks
- Oxidation
- Contamination
- Surface deformation
- Krassen
Preparation should be controlled carefully because aggressive preparation can itself modify a surface layer.
5. Specimen stability
The specimen should remain stable during loading.
Any movement between the specimen and the indenter can influence the indentation shape.
Suitable fixtures or supports can be especially important for:
- Small specimens
- Thin sections
- Irregular samples
- Cross-sectional metallographic specimens
6. Vibration control
Microhardness testing can be sensitive to vibration because the indentation and measurement scale are small.
External vibration can come from:
- Nearby machinery
- Foot traffic
- Building movement
- Pumps
- Fans
- Laboratory equipment
A stable installation and appropriate vibration isolation can improve measurement consistency.
7. Indentation spacing
Indentations should not be placed too close together.
The deformation created by one indentation can influence a nearby measurement.
The required spacing depends on the applicable test method and material. Operators should follow the relevant standard rather than using arbitrary distances.
8. Operator technique
Even automated equipment benefits from trained operators.
Important practices include:
- Selecting the correct test force
- Correctly positioning the specimen
- Maintaining a clean optical field
- Identifying indentation corners consistently
- Avoiding unsuitable test areas
- Reviewing unusual results
Training is especially important when measurements are close to the lower end of the instrument’s practical capability.
9. Environmental conditions
Temperature, humidity, dust, and vibration can influence precision.
A clean, stable laboratory environment is generally preferable for microhardness testing.
Environmental control becomes more important when the measurement uncertainty is small relative to the differences being investigated.
10. Reference verification
Routine verification with suitable reference materials can help confirm that the instrument continues to perform as expected.
Reference blocks should be appropriate for the test method and hardness range.
Verification records can also provide evidence of long-term measurement stability.
Micro Vickers Testing Process
Specimen preparation
The surface should be sufficiently smooth and clean for indentation and optical measurement.
For cross-sectional studies, the specimen may be mounted and polished before testing.
Indenter positioning
The diamond indenter is aligned with the intended test location.
Positioning is especially important when testing near interfaces, coatings, or individual microstructural regions.
Force application
The selected force is applied according to the defined test procedure.
The dwell time should also be controlled consistently.
Indentation measurement
After the test force is removed, the indentation is examined under magnification.
The two diagonals are measured.
If the indentation is not clearly formed or the corners cannot be identified reliably, the result may require investigation.
Hardness calculation
Vickers hardness is calculated from the applied force and the measured indentation dimensions.
A simplified relationship is:
HV = 1.8544 × F / d²
where:
- HV = Vickers hardness
- F = applied test force
- d = mean length of the two indentation diagonals
The exact units and calculation procedure should follow the applicable testing standard and instrument configuration.
Materials and Applications
Dunne coatings
Micro Vickers testing can help characterize the hardness of thin surface layers without creating an indentation that extends deeply into the underlying material.
This is useful for evaluating certain plated, coated, or treated surfaces.
Heat-treated layers
Case hardening and other surface treatments can create hardness gradients.
A series of micro Vickers measurements at increasing depths can help characterize how hardness changes through the treated layer.
Small components
Small components may not provide enough area for conventional hardness methods.
Micro Vickers testing can allow localized measurement while preserving much of the surrounding material.
Weld zones
A weld can contain several distinct regions with different microstructures.
Microhardness mapping can help compare:
- Lasmetaal
- Heat-affected zone
- Basismateriaal
This can provide more localized information than a single bulk hardness measurement.
Metallurgisch onderzoek
Researchers can use micro Vickers testing to study local hardness differences associated with microstructure, processing conditions, heat treatment, and material composition.
Micro Vickers vs Standard Vickers Testing
| Factor | Micro Vickers | Standard Vickers |
|---|---|---|
| Testkracht | Relatively low | Generally higher |
| Indentation size | Very small | Larger |
| Test area | Small/localized | Larger |
| Optical measurement | Highly important | Important |
| Thin layers | Well suited | May be less suitable |
| Small components | Well suited | More limited |
| Microstructurele analyse | Strong application | More limited |
| Vibration sensitivity | Hoger | Generally lower |
The boundary between micro and conventional Vickers testing depends on the applicable standard and terminology used by the equipment manufacturer.
Micro Vickers vs Rockwell Testing
| Factor | Micro Vickers | Rockwell |
|---|---|---|
| Measurement principle | Indentation dimensions | Diepte inkeping |
| Typical application | Small areas and thin layers | Production hardness testing |
| Optisch systeem | Required for indentation measurement | Not normally required |
| Testkracht | Low | Standardized higher forces |
| Thin specimens | Potentially suitable with correct procedure | More restrictive |
| Test speed | Can be slower | Typically very fast |
| Local hardness mapping | Uitstekend | Beperkt |
Rockwell testing is often more convenient for routine production inspection, while micro Vickers testing provides much greater flexibility for localized analysis.
How to Select a Micro Vickers Hardness Tester
1. Review the available test-force range
Make sure the tester covers the forces required for your materials and applications.
2. Evaluate optical performance
Check magnification, resolution, illumination, camera quality, and measurement software.
3. Check indentation measurement functions
Automatic or assisted measurement can reduce manual measurement effort, but the system should still allow the operator to review the indentation.
4. Examine specimen capacity
Consider the size, thickness, and shape of your typical specimens.
5. Review positioning accuracy
Precise movement of the specimen or test head is valuable when performing hardness profiles or closely spaced measurements.
6. Consider automated testing
For research and repetitive production applications, automated indentation sequences can increase efficiency.
7. Check data-management features
Useful functions may include:
- Test-result storage
- Hardness profiles
- Image capture
- Measurement reports
- Statistische analyse
- Data export
8. Evaluate verification and service support
Confirm that suitable reference blocks, replacement indenters, optical components, and technical support are available.
Common Measurement Problems
Indentation corners are unclear
Possible causes include poor surface preparation, insufficient optical resolution, excessive surface deformation, or unsuitable test conditions.
Hardness results vary significantly
Check specimen stability, indentation spacing, vibration, indenter condition, test force, and operator technique.
Results are unexpectedly high
Possible factors include surface hardening during preparation, an inappropriate test force, an incorrect calculation setting, or testing too close to an edge or previous indentation.
Results are unexpectedly low
Possible causes include substrate effects, specimen movement, incorrect force selection, indenter problems, or unsuitable surface preparation.
Hardness changes sharply across a profile
A genuine hardness gradient may exist, especially in treated layers. However, the spacing, test force, surface preparation, and indentation size should also be reviewed before interpreting the result as a material characteristic.
Veelgestelde vragen
What is a Micro Vickers Hardness Tester used for?
It is used to measure hardness in small or localized material areas using relatively low test forces. Common applications include thin layers, coatings, heat-treated surfaces, weld zones, small components, and metallographic research.
What test forces are used in micro Vickers testing?
Micro Vickers testing uses relatively low forces compared with many conventional hardness tests. The appropriate force depends on the material, specimen geometry, hardness range, and applicable testing requirements.
Can micro Vickers testing measure thin coatings?
Yes, it can be suitable for certain thin coatings and surface layers when the test force, indentation size, coating thickness, and substrate effects are properly controlled.
Why is surface preparation important?
The indentation must be clearly formed and measured. Roughness, scratches, contamination, and preparation damage can make indentation measurement less reliable or alter the measured hardness.
How is micro Vickers hardness calculated?
The hardness value is determined from the applied test force and the average length of the two indentation diagonals. The standard Vickers relationship uses the square of the mean diagonal length.
Does vibration affect micro Vickers testing?
Yes. Because the indentation is small and the measurement is highly localized, vibration can interfere with stable force application and optical observation.
Is a microscope required for micro Vickers testing?
Yes. Micro Vickers measurements require accurate observation and measurement of the small indentation. Modern testers commonly integrate an optical microscope, digital camera, or automated imaging system.
How often should a micro Vickers tester be verified?
Verification frequency depends on the equipment, application, quality system, usage level, and applicable standards. Regular verification should be established according to the relevant requirements rather than using one universal interval.
Conclusie
A Micro Vickers hardheidsmeter provides a powerful solution for measuring hardness in areas that are too small, thin, or localized for many conventional hardness methods. Its ability to use relatively low test forces makes it valuable for coatings, treated layers, weld zones, small components, and metallurgical research.
Reliable results depend on much more than the tester itself. Test-force selection, indenter geometry, surface preparation, optical measurement, specimen stability, vibration control, indentation spacing, and verification all contribute to measurement quality.
When selecting a microhardness system, buyers should therefore evaluate the complete testing workflow. A well-matched instrument with precise loading, high-quality optics, suitable positioning, strong data functions, and proper reference equipment can provide valuable insight into local material behavior and support more detailed quality-control decisions.